
The Edge Reveals How the Deck Was Planned
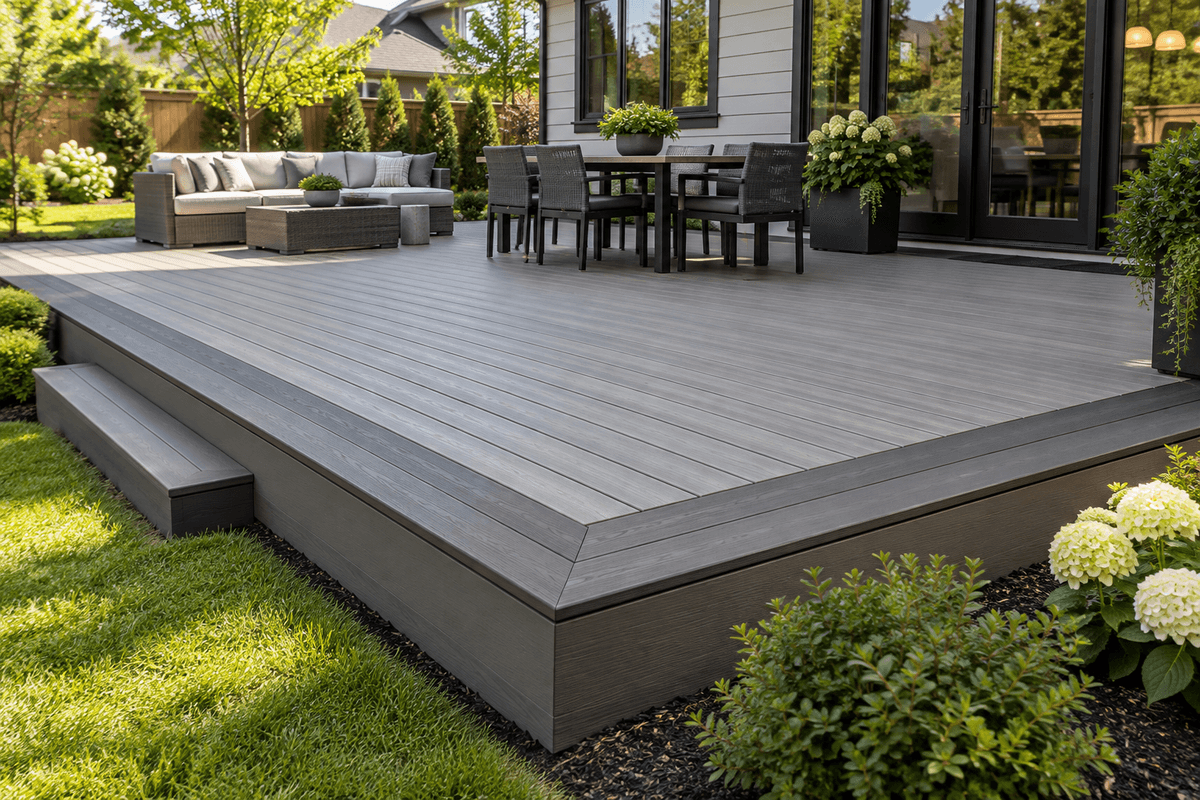
Learning how to finish composite decking edges is not only about covering a cut. The perimeter controls the first view from the yard, the transition at stairs, the way fascia meets the surface, and the fastening method for the last board. A clean edge begins in the framing plan.
Choose the finish before joists and blocking are complete. The deck edge guide, installation planning guide, and hidden-fastener guide guides show why a border, fascia, and field boards must be treated as one assembly rather than separate decorative purchases.
Picture Framing Turns Cut Ends Into a Deliberate Border
A picture-frame board runs around the perimeter so the field-board ends terminate against a finished edge instead of facing outward. The border may match the field or use a contrasting color. One-board frames are restrained; wider or double frames make a stronger architectural statement.
The frame needs dedicated support below every fastening line and corner. Mitered corners also require accurate cuts and approved fastening close enough to control movement without splitting or deforming the board.
Fascia Finishes the Vertical Face
Fascia covers the rim joist and can visually deepen the deck. It may match the field, repeat the border color, or connect with stair risers. Fascia products are often thinner than deck boards and have their own fastener pattern and expansion requirements.
Do not assume fascia can support a walking edge or replace structural framing. Coordinate its top position with the picture frame so water can leave and the reveal stays consistent. The expansion-gap guide guide helps prevent a tight trim detail from locking moving boards together.
- Select the edge treatment before final framing and material takeoff.
- Add blocking for every border board, joint, plug, and corner fastener.
- Use square-edge, grooved, fascia, and trim products only as approved.
- Plan drainage and expansion clearances at the perimeter.
- Mock up the border, fascia, and stair transition before cutting the full order.
Square-Edge Boards Simplify Visible Perimeters
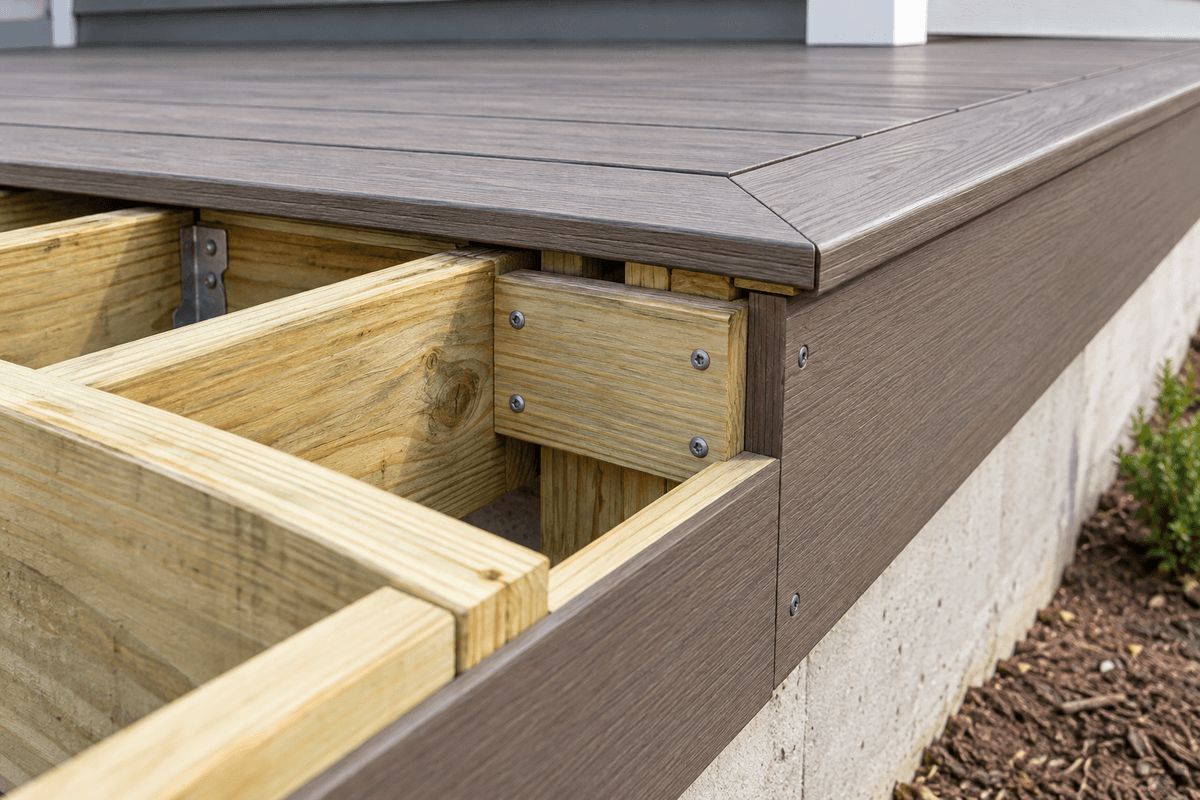
Grooved boards are convenient in the field because hidden clips engage their sides, but an exposed groove can look unfinished. A compatible square-edge board can create a solid outside face and provide a suitable surface for approved face fastening or plugs.
Collections do not always offer every profile in every color or width. Confirm availability early. If a field board must be routed for a specific detail, follow the manufacturer's instructions rather than recreating a groove by eye.
Plugs Hide Screws Without Hiding the Need for Support
Color-matched plugs can make face fastening less visible at borders and stairs. They work only with the specified screw, bit, counterbore, and board. An oversized hole, incorrect depth, or plug installed across the grain can remain obvious.
Practice on an offcut and inspect it in side light. Place fasteners over sound framing and maintain required distances from board ends. The finish is cosmetic; the underlying connection still has to satisfy the installation guide.
Paint, Caulk, and Generic Caps Are Not Universal Fixes
Coating a cut end, filling a gap with caulk, or attaching an unapproved cap may trap moisture, restrict movement, discolor the board, or create a warranty issue. Composite formulations and cap constructions differ, so a method seen on one product should not be transferred automatically.
Read the care and installation documents for the exact collection. If an edge remains visible by design, a clean square cut and intentional layout may look better than a mismatched accessory.
Corners Decide Whether the Detail Looks Precise
A perfect miter on the workbench may open or close as temperature changes. Some systems use butt joints or alternative corner details for that reason. Follow the selected product's guidance and account for installation temperature.
Check the deck for square before cutting all corners. Small framing errors accumulate at the perimeter. A border that gradually changes width is more noticeable than a slight correction made within the field layout.
Board Direction Determines Which Ends Need Attention
Field boards running away from the house expose many cut ends at the outside rim, making a picture frame especially useful. Boards running parallel to the house may reduce that row of end cuts but create different joints at stairs, breaker boards, and side elevations. Diagonal layouts create the most complex perimeter because every board meets the border at an angle.
Draw the surface pattern together with the framing plan. Mark every location where a groove would remain visible, where a square-edge board is needed, and where two fastening methods meet. This prevents the crew from discovering halfway through installation that the available profile cannot complete the intended detail.
Consider maintenance access as well. A border may be the first board removed to reach a damaged field board, while tightly layered fascia can hide fasteners. Record the installation sequence and keep spare plugs and approved fasteners with the project file.
Price the Edge as a System
Border boards, fascia, blocking, specialty fasteners, plugs, extra cuts, and labor can materially change the project cost. They also create value by protecting the design from looking incomplete. Include these components in the complete deck budgeting article estimate instead of treating them as leftover trim.
Review decking and flooring options options together with square-edge and fascia availability. You can contact Composite Deck Pro with deck dimensions, board direction, stair locations, preferred border style, and photos of visible elevations before finalizing the edge package.