
Hidden Does Not Mean Generic
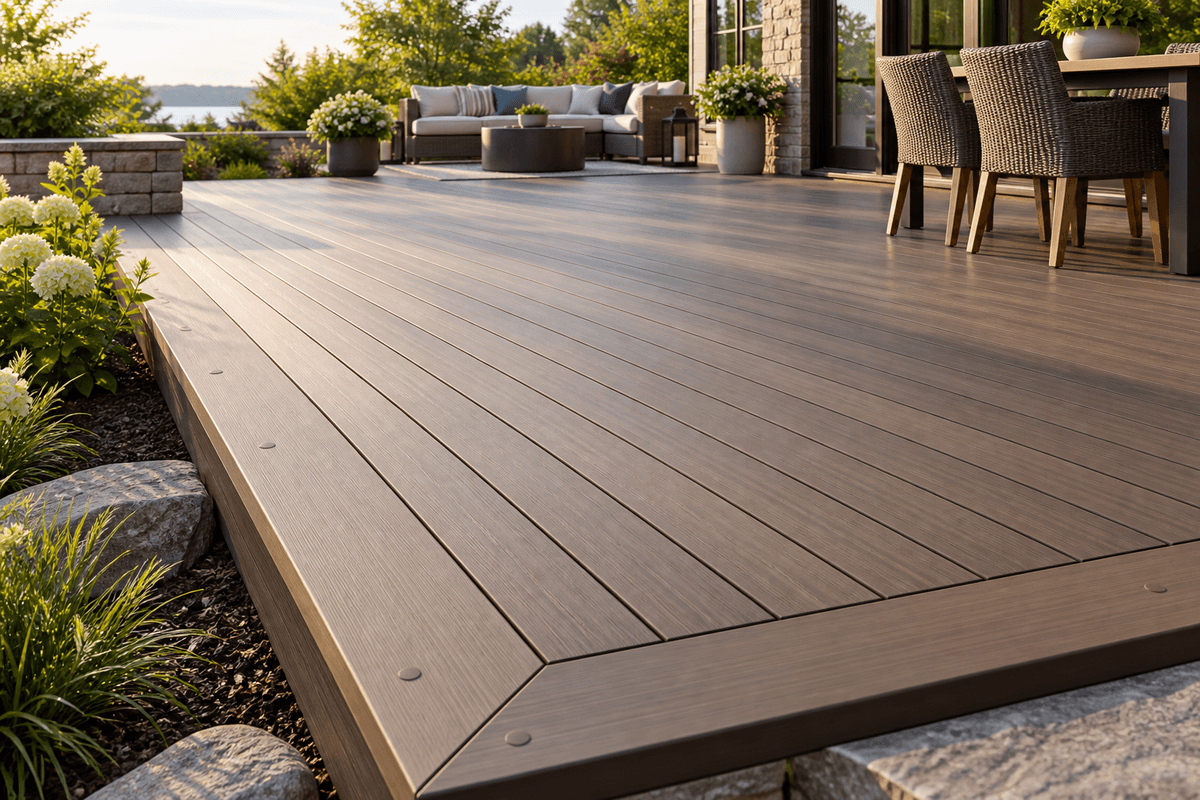
Composite decking hidden fasteners create a smooth field without rows of exposed screw heads. Most clip systems engage grooves along board edges and attach to the joists below. The idea is simple; compatibility is specific. Groove shape, clip geometry, screw material, framing type, and approved board collection must match.
Choose the board and fastening system together. The grooved decking guide, composite deck board guide, and installation planning guide resources explain why a clip described as universal still needs confirmation against the current product instructions.
The Main Field Is the Easy Part
Clips repeat efficiently across straight rows. Complexity appears at the first and last boards, house wall, picture-frame border, breaker board, posts, stairs, and butt joints. Those locations may require starter clips, face fastening, plugs, doubled framing, or square-edge boards.
Draw each transition before installation. The edge finishing guide guide helps plan the visible perimeter, while the complete deck budgeting article article accounts for specialty hardware and blocking that a simple square-foot estimate may miss.
- Match the clip to the exact grooved board collection.
- Confirm compatibility with wood, steel, or aluminum framing.
- Identify fastening methods for first, last, border, and stair boards.
- Provide blocking or doubled joists where the system requires it.
- Order spare clips, screws, plugs, and matching boards for repairs.
Clips Set Side Gaps, Not Every Gap
Many systems include spacer tabs that establish consistent side-to-side gaps. End-to-end joints and clearances at posts, walls, and borders still require separate measurement. Temperature at installation and board length may affect the specified end gap.
Do not borrow a spacing number from another brand. Follow the selected board's current guide and check straightness every few rows. A clip can maintain a repeated distance while the entire field slowly drifts out of square.
Fastener Position Affects the Hold
The screw should land correctly in the supporting joist, and the clip must fully engage the groove. Overtightening can distort a clip or pull one row out of alignment; loose hardware can leave movement. Angled layouts and butt joints often have special positioning rules because the screw must remain inside the framing.
Use the recommended bit and tool setting, keep the clip flat, and inspect engagement before the next board hides it. A short test assembly using offcuts can reveal problems before hundreds of fasteners are installed.
Plan for One Board to Be Damaged
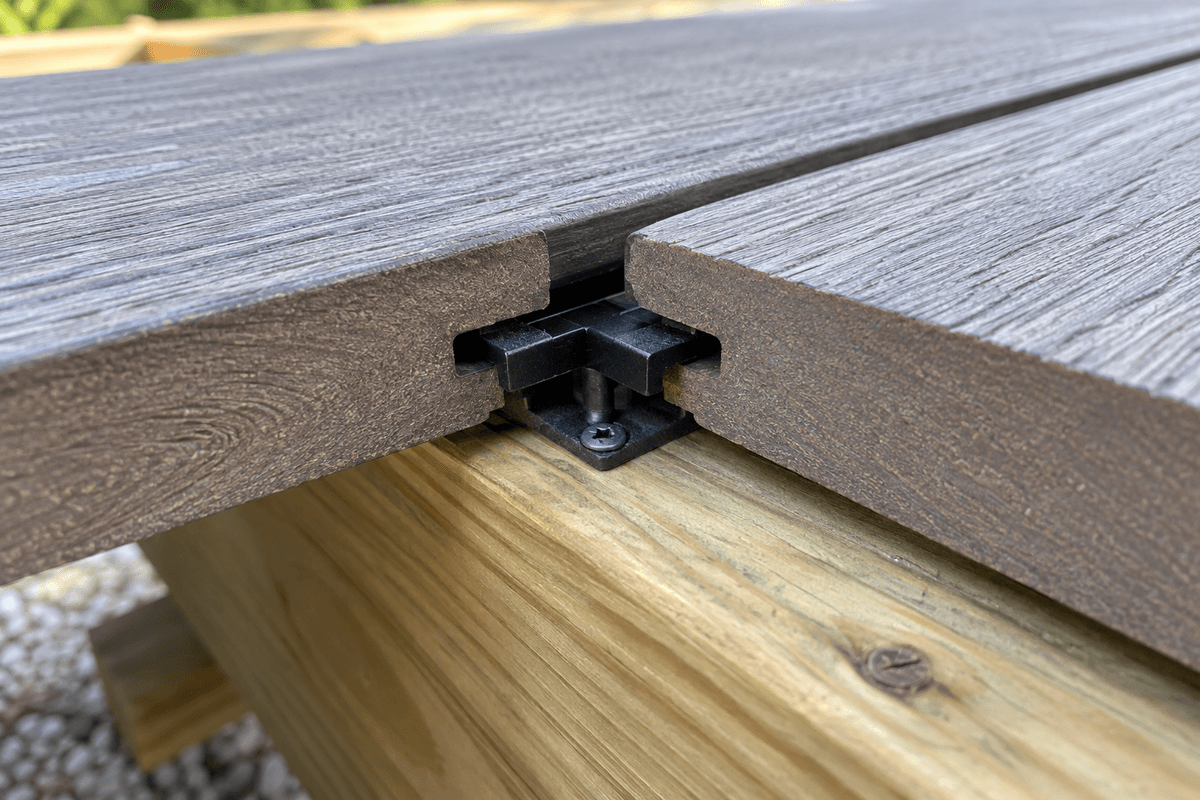
A concealed system looks excellent, but board removal can be less obvious than backing out face screws. Learn the manufacturer's replacement method and keep the exact hardware. Access differs at a perimeter board versus the middle of a large field.
Routine cleaning matters too. Open gaps help drainage, yet leaves and fine debris can bridge them. The cleaning routine, moisture-planning guide, and low-maintenance decking overview resources keep the hidden system connected to the performance of the whole deck.
Work Through the Installation Sequence
Begin with a dry layout across the full width of the deck. Calculate the likely width of the final row after board widths and clip gaps are included. A narrow sliver at the house or outside edge is difficult to fasten and looks accidental. Small adjustments to the starting line, balanced ripping of edge boards where permitted, or a planned picture frame can create a more professional result. Confirm every modified edge is supported and fastened by an approved method.
Install starter hardware on a straight reference line rather than following an uneven wall or fascia. Set several boards loosely, check their alignment from both ends, and tighten in the sequence specified by the fastener manufacturer. Periodically measure back to the reference line. Hidden clips make spacing repeatable, but they cannot correct a first row that starts out of square or joists that wander away from the layout.
Treat posts and penetrations as individual details. A board interrupted by a railing post needs adequate clearance and support without leaving an oversized visible opening. Avoid notches that create a fragile strip of material. Where a border meets the field, map which screws, plugs, clips, and blocking will be accessible at each stage. The last fastener often has to be installed before the neighboring board closes the working space.
Keep installation hardware organized by function. Starter clips, field clips, butt-joint fasteners, plugs, and approved face screws can look similar once removed from packaging. Label trays and retain the product instructions on site. Stainless or specially coated hardware may be required in wet, coastal, treated-lumber, or metal-framing conditions; an unapproved substitute can create corrosion, staining, weak attachment, or warranty questions.
Finish with a repair rehearsal. Identify how a center board would be removed without damaging its neighbors and store spare boards flat as directed. Photograph framing and clip placement before the final rows conceal them. A hidden-fastener deck succeeds not because every connection disappears, but because the entire fastening plan remains compatible, serviceable, and visually controlled.
The Finish Comes From the Plan
Hidden fasteners are most valuable when they support a deliberate board layout. They do not remove the need for accurate framing, expansion space, drainage, or a thoughtful edge. A mixed strategy using clips in the field and plugs or approved screws at details often produces the cleanest result.
Review decking and flooring options options with the fastening plan beside them. You can also contact Composite Deck Pro with a framing sketch, board profile, stair layout, and border detail to clarify the system before ordering.