
Do Not Frame From Memory
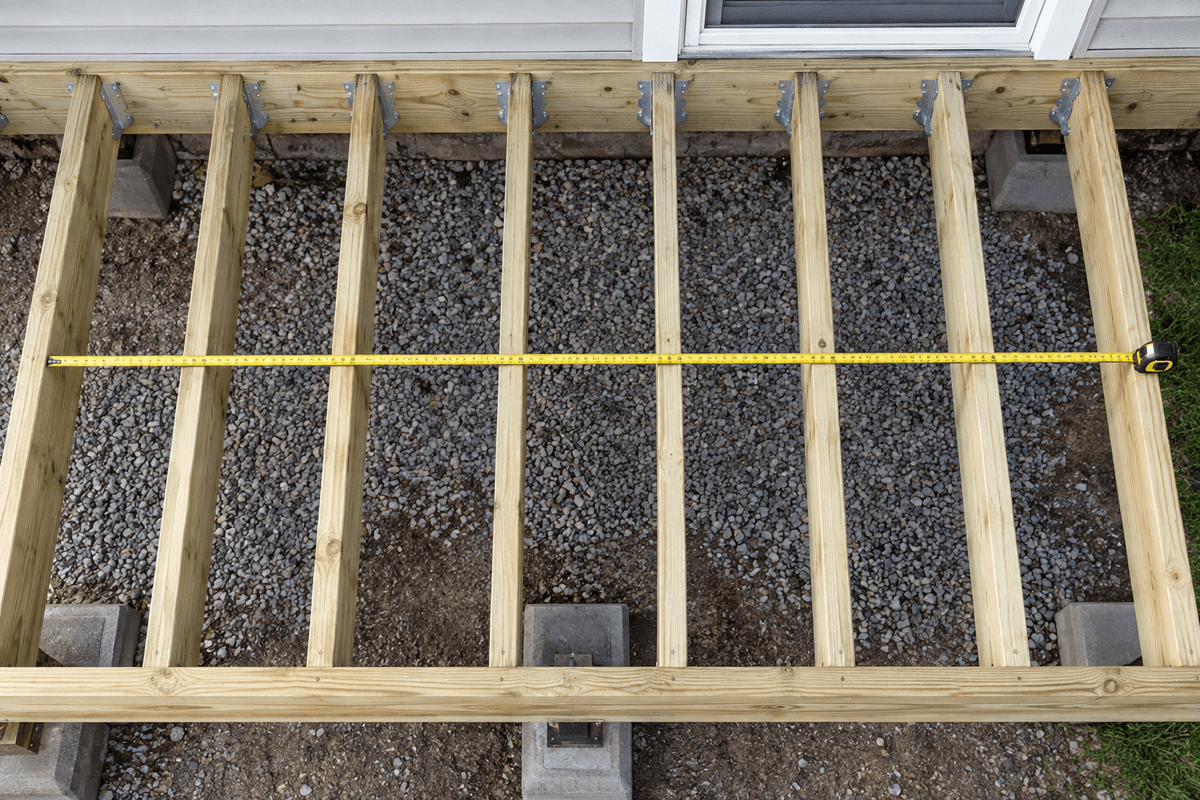
Composite decking joist spacing is not one universal dimension. The maximum depends on the exact product, board profile, installation angle, use, and sometimes local requirements. A spacing familiar from straight residential wood decking may be too wide for a thinner profile, diagonal layout, stair tread, or commercial application.
Select the decking before finalizing the frame. Use the current installation guide, then compare the layout advice in composite deck board guide, installation planning guide, and manufacturer comparison guide.
On Center Is the Measurement That Matters
Joist spacing is normally stated on center, meaning from the centerline of one joist to the centerline of the next. Confusing clear space with on-center spacing creates a frame that is wider than intended. Mark a few bays and verify the accumulated dimension rather than checking only one gap.
Consistent spacing supports a flatter surface and gives each fastener a reliable target. Crowns, twists, and uneven joist tops should be corrected before boards cover the frame.
- Confirm the exact decking collection and profile.
- Check straight, diagonal, stair, and commercial requirements separately.
- Measure joists on center, not the open gap between them.
- Add blocking for borders, butt joints, posts, and railing connections.
- Inspect an existing frame before assuming it can be resurfaced.
Diagonal Boards Shorten the Effective Span
When boards cross joists at an angle, the unsupported path between supports changes. Manufacturers commonly require tighter framing for diagonal patterns. Decorative layouts also create short board ends and joints that need blocking in places a basic rectangular frame would not.
Decide board direction early. The visual effect described in the outdoor color testing guide and edge finishing guide guides must be supported by a frame drawn for that pattern, not added after framing is complete.
Stairs Are Their Own Structure
Deck stair treads concentrate traffic and have exposed edges. They may require closer stringer spacing, approved solid boards, and fastening methods different from the main deck field. Never extend the field-deck spacing rule to stairs without checking the instructions.
Plan nosing, risers, railing posts, and lighting before cutting stringers. Blocking added later is rarely as clean or strong as support included in the original stair design.
Resurfacing Begins With a Tape Measure
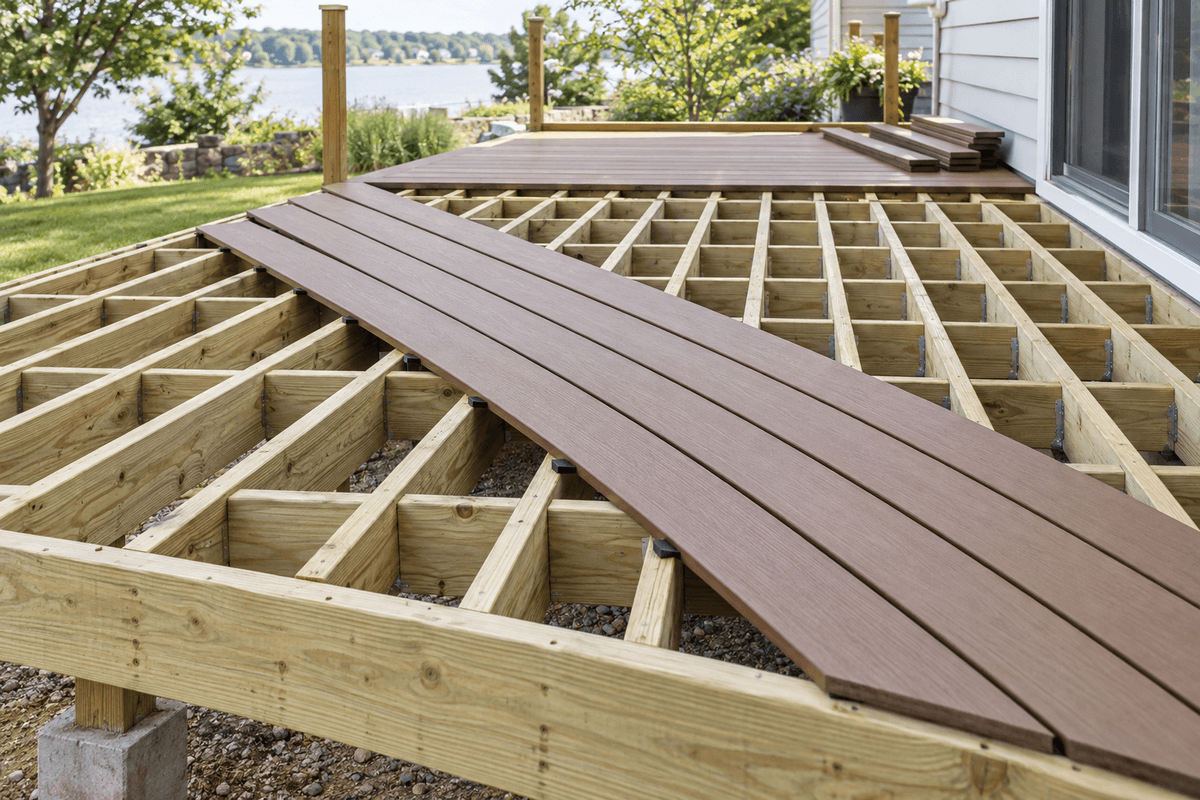
An old wood frame may have irregular spacing, damaged joist tops, out-of-square bays, and unsupported joints. Measure every section after the old boards are removed. If the selected composite requires tighter spacing, sistering or adding joists may be necessary.
Protect repaired framing and correct drainage before installing the new surface. The moisture-planning guide, deck lifespan article, and low-maintenance decking overview articles explain why the frame often determines whether a long-lived board delivers long-lived value.
Turn the Installation Guide Into a Framing Plan
Convert the manufacturer's spacing requirements into a dimensioned drawing before lumber is ordered. Show the direction of every deck board, the perimeter frame, breaker boards, stairs, posts, and planned butt joints. Each change in direction creates new support needs. The drawing should also identify where two fasteners must share an area, since a single narrow joist may not provide enough room to maintain correct edge distances.
Check the frame as a whole rather than treating joist spacing as the only number. Beam locations, joist spans, cantilevers, blocking, connections, and footing capacity must satisfy the structural design and applicable code. Adding closely spaced joists does not repair an undersized beam or weak ledger. For a new deck, coordinate these decisions before permits and material orders. For resurfacing, expose enough of the structure to verify the load path.
Board stiffness can vary among product families and profiles. A spacing allowed for one solid board may not apply to a scalloped or lighter profile, and an approved residential layout may differ from a commercial or high-load application. Do not assume that boards sold under the same brand share one framing table. Record the exact collection and preserve the guide used for the project.
During framing, use a consistent reference edge and verify cumulative dimensions. Small layout errors can place hidden-fastener screws near joist edges or cause a breaker board to miss its blocking. Before decking arrives, lay a few offcuts over critical transitions and confirm that all clips and screws have full support. Correcting one joist at this stage is far easier than dismantling finished rows.
The best spacing is therefore not simply the tightest affordable pattern. It is the verified layout that supports the chosen board under its actual direction and use while coordinating every finish detail. That approach reduces bounce, uneven fastening, visible waves, and last-minute blocking, giving the surface a better chance to perform as designed.
Build the Support for the Exact Deck
Tighter spacing can increase material and labor, but adding support blindly is not a substitute for design. The correct frame satisfies the product guide, local code, load path, board pattern, fastener locations, and finished details.
Bring the board specification and a dimensioned layout to the framing discussion. Explore decking and flooring options choices before construction, or contact Composite Deck Pro with the intended board direction, stairs, borders, and existing-frame measurements.