
The Groove Is Part of a Fastening System
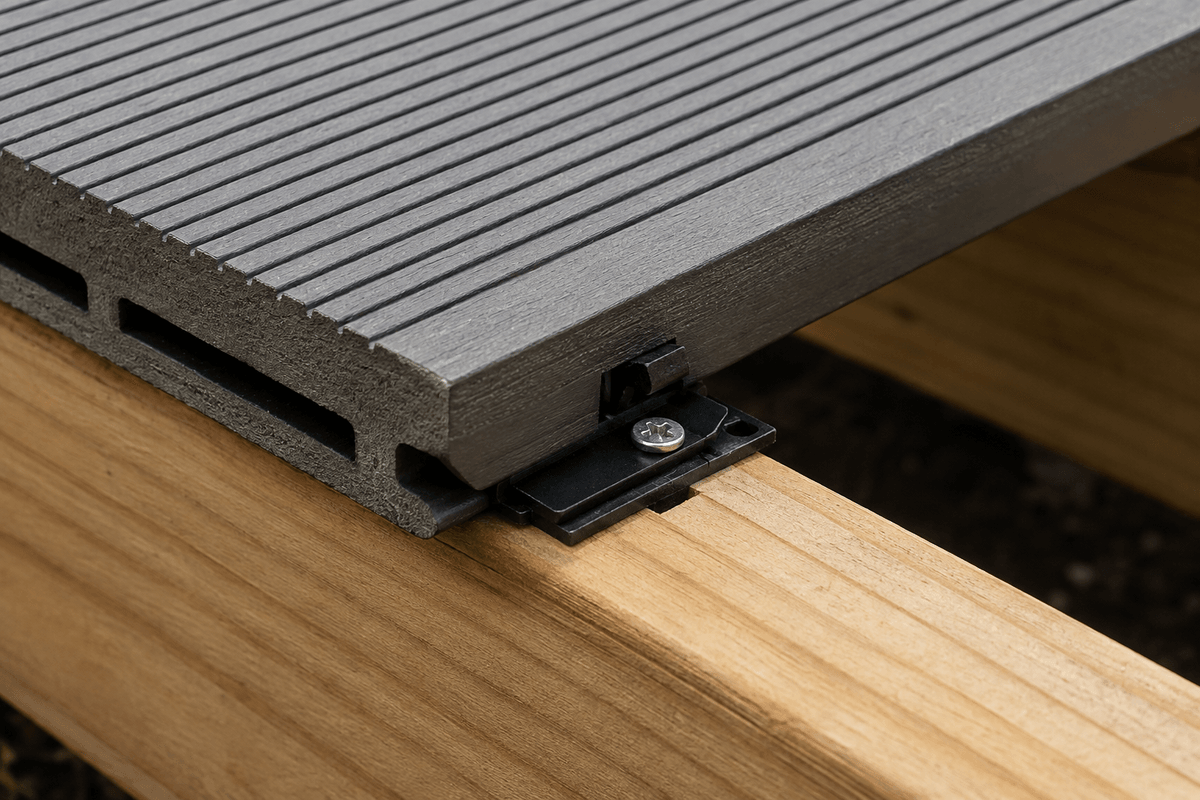
People searching for groove decking are usually interested in a deck surface without rows of visible screws. The channel along each long edge gives a compatible clip somewhere to grip, while the clip is secured to the joist below. Once the next board slides into place, most of the hardware disappears between the boards. The result can look calm and continuous, particularly across a broad field of decking.
That clean surface begins with compatibility, not appearance. Groove dimensions, clip shape, screw type, framing material, and required board spacing can vary by product. A board and a clip may both be described as "universal" and still require confirmation. Review the board maker's current installation instructions before ordering either component. The grooved board and hidden-fastener guide, composite deck board guide, and composite decking installation guide resources can help turn a visual preference into a complete system decision.
Hidden Clips Solve One Detail, Not Every Detail
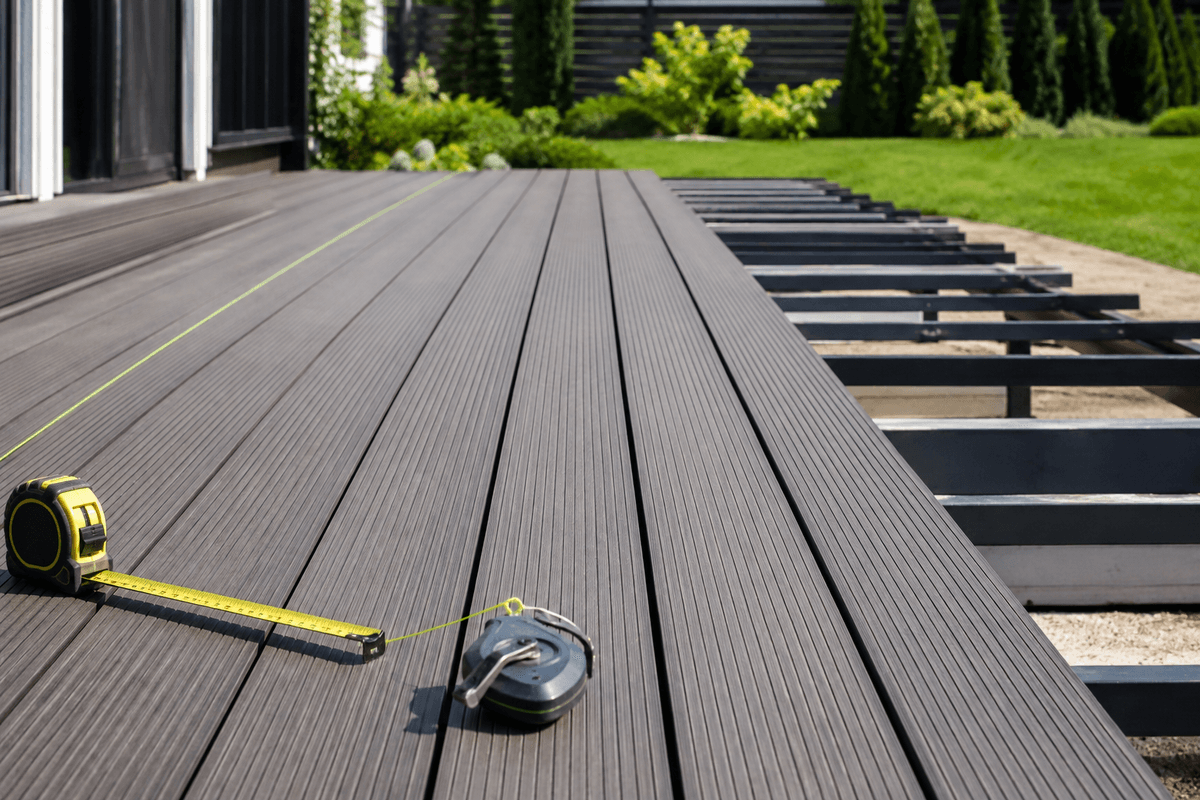
Grooved boards work especially well in the main field of a simple rectangular deck. They do not automatically solve the first board beside the house, the last board at the outer edge, stair treads, picture-frame borders, or short infill pieces around posts. Those locations may need starter clips, face screws, angled fasteners, or a screw-and-plug system.
This is why an installer should draw the fastening plan before laying the first row. If the deck has multiple levels, diagonal boards, breaker boards, or wide stairs, the drawing should show where clips stop and another fastening method begins. The deck edge finishing guide and expansion gap guide articles are useful companions because perimeter treatment and movement gaps often meet in the same places.
- Confirm that the selected clip is approved for the exact board profile.
- Order the correct starter and finish clips for restricted edges.
- Plan square-edge or plug-fastened boards for stairs and picture frames when required.
- Check joist spacing, blocking, and board orientation before material delivery.
- Keep the product installation guide available on site instead of relying on habit.
Board Spacing Comes From the System
Many hidden clips act as spacers, but the gap they create is not merely cosmetic. Side-to-side spacing helps water and small debris pass through, gives the deck room to respond to temperature, and establishes a consistent shadow line. End gaps at butt joints and fixed objects usually require separate attention because a clip between board edges cannot set them.
Do not force a preferred gap by overtightening clips or substituting hardware. Composite products respond differently to heat, moisture, and loading. The correct spacing may depend on installation temperature as well as board length. A disciplined installer follows the selected system rather than borrowing a dimension from another brand or an older project.
Straight Rows Make the Hidden Finish Convincing
A fastener-free surface makes alignment more noticeable, not less. If each row drifts slightly, the gap lines reveal the problem across the whole deck. Check the frame first, establish a reliable starting line, and measure back to a fixed reference every few rows. Small corrections made early are far easier than tapering the final board into an obvious wedge.
Board layout also affects waste. A picture frame can hide cut ends and produce a finished border, but it adds blocking, cuts, fasteners, and careful alignment. Diagonal patterns create more offcuts and usually require tighter framing. The composite deck cost guide guide helps account for those choices before a clean visual detail becomes an unexpected labor charge.
Consistent gaps do not prove the whole deck is ready. Joists that crown in different directions can telegraph unevenness through the finished surface, and missing blocking can leave short ends unsupported. Correct the frame before clips begin locking rows together. Hidden hardware rewards careful preparation because there are fewer visible fasteners available to pull an irregular board into submission.
Service Access Deserves a Plan
One tradeoff of concealed fastening appears years later when a board must be removed. Access may be easy with some clip systems and more involved with others, especially in the center of the deck. Keep a small quantity of matching boards and fasteners after installation, record the product name and color, and save the instructions for board replacement.
Debris between boards should also remain reachable with ordinary cleaning. Hidden clips are not a substitute for drainage, ventilation, or a sound substructure. The composite decking cleaning routine, moisture-planning guide, and low-maintenance decking overview resources explain the everyday side of keeping the whole assembly working rather than focusing only on the visible surface.
Order quantities deserve the same system thinking. Clips are normally counted by board area or joist intersections, but stairs, borders, starter rows, and waste alter the total. Keep a reserve of the exact clip and screw instead of expecting a later substitute to fit. A small labeled box stored with the spare boards can make a future repair much more straightforward.
The Best Groove Is the One That Fits the Layout
Groove decking is a strong choice when the design benefits from a smooth field of boards and the manufacturer offers a proven clip system. Square-edge boards may still be the better tool at boundaries, stairs, and locations that need direct fastening. Most polished decks use both profiles deliberately rather than forcing one board type into every condition.
Compare samples, fasteners, edge details, and installation instructions as one package. Composite Deck Pro can help you explore material options, or contact Composite Deck Pro with a sketch showing joists, stairs, borders, and fixed objects. A clean surface is the outcome; a compatible installation plan is what makes it possible.